


Let’s Encrypt is a certificate authority that provides free SSL certificates.
SSL Certificates are small data files that digitally bind a cryptographic key to an organization’s details. When installed on a web server, it activates the padlock and the HTTPS protocol and allows secure connections from a web server to a browser and vice-versa.
How to install the certificate using Let’s Encrypt?
You can follow the official docs or directly use Certbot to install the certificates for your server (like Apache, Nginx etc.) and OS (Linux, CentOS etc.)
What is the problem?
Let’s encrypt needs to be renewed every 90 days, and once configured on your server, it starts sending you emails a few weeks before the actual expiry date. Which is good but kind of annoying as well, if you like to keep your mailbox clean.
So we need to manually trigger the cerbot renew command from each server to renew SSL certificates, which is ok to some extent.
Let’s imagine a hypothetical scenario where you have to renew multiple SSL Certificates whose expiry date is very close. Isn’t that tedious to manually enter each server just to trigger the certbot to renew your certificates?
So, can’t we have a permanent solution? The obvious answer is, YES WE CAN!
What's the solution?
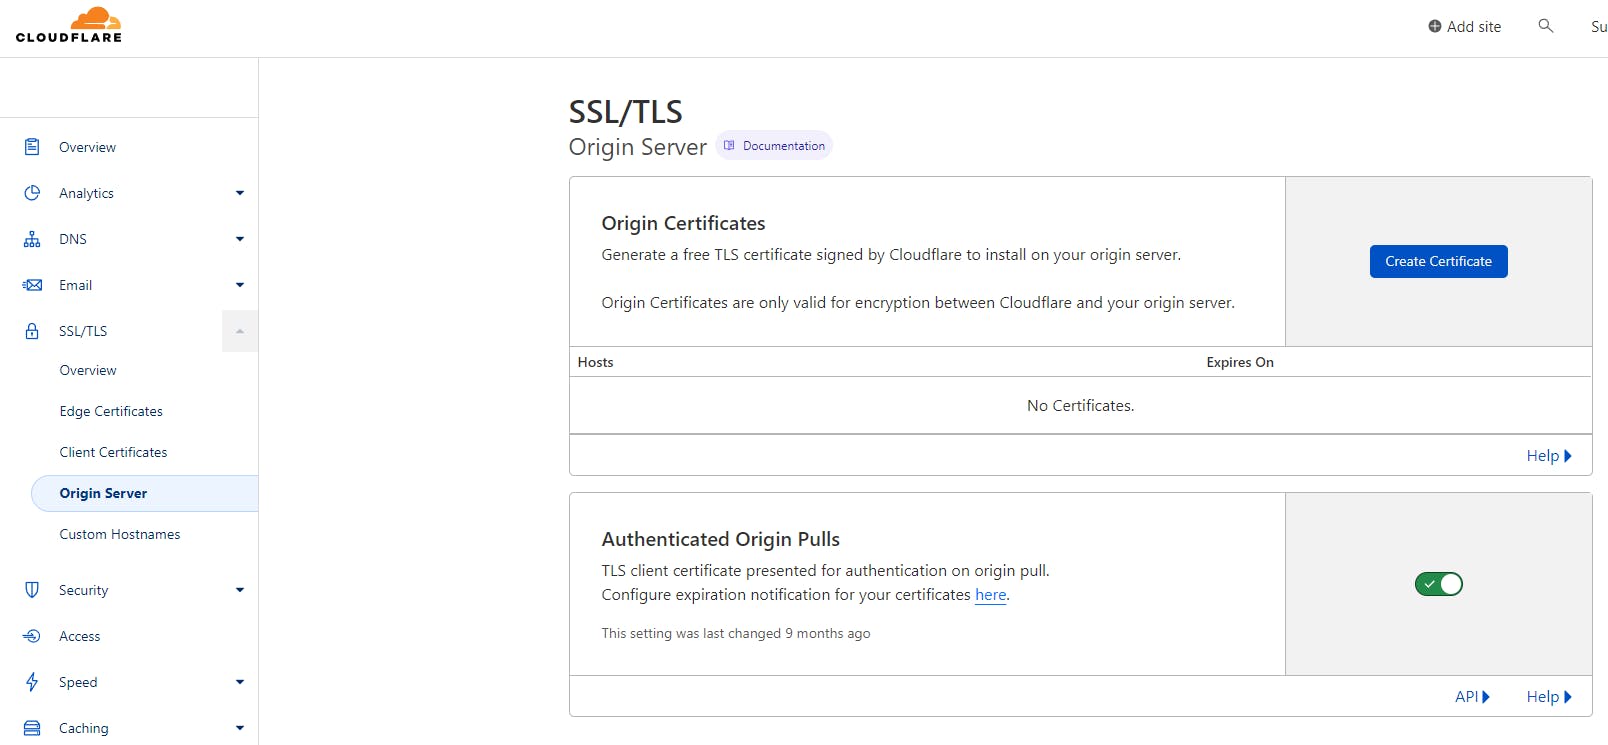
Step 1: Obtain Permanent Keys from Cloudflare
The first step in setting up SSL with permanent keys from Cloudflare is to obtain the necessary keys. This can be done by navigating to the "SSL/TLS" tab in your Cloudflare account, and selecting "Create Certificate" under the "Origin Certificates" section. You will then need to enter the domain name for which you want to generate the certificate and click "Next".
Click on Create Certificate and select the default RSA (2048) key type and choose your certificate validity period (During this period you never had to renew your certificates)
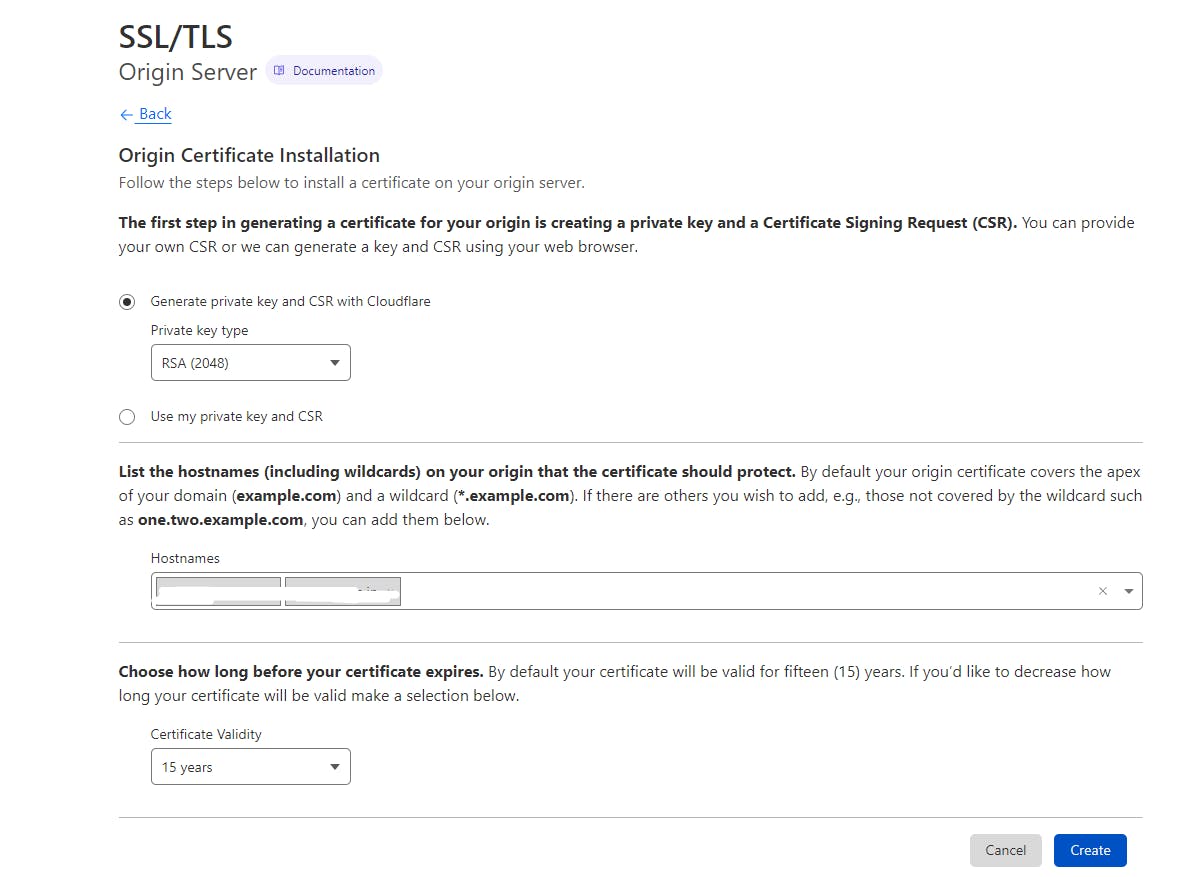
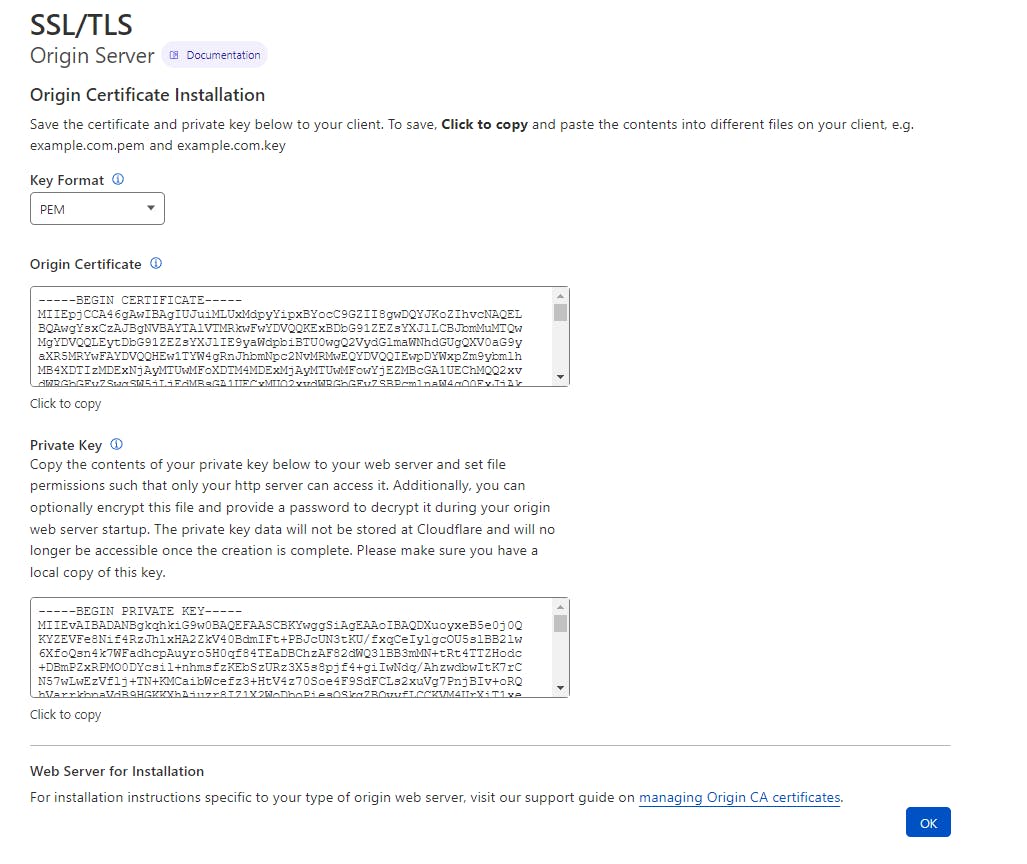
Make sure to copy and store the keys in safer vault storage,
Step 2: Configure Nginx (Reverse Proxy)
Once you have obtained the permanent keys, you can now configure Nginx to use them. This can be done by adding the following code to your Nginx configuration file, typically located at /etc/nginx/nginx.conf:
server {
    listen 443 ssl;
    server_name example.com;

    ssl_certificate /path/to/your_certificate.crt;
    ssl_certificate_key /path/to/your_private_key.key;
}
This code configures Nginx to listen on port 443 (the default port for HTTPS) and use the specified SSL certificate and private key for the domain example.com. Replace the path to your certificate and private key and domain name with the actual values from your Cloudflare account.
Step 3: Test the Configuration Once you have configured Nginx to use the permanent keys from Cloudflare, you can test the configuration by visiting your website using https://. If the configuration is set up correctly, you should see the padlock icon in the browser indicating that the connection is secure.
In conclusion, using permanent keys for SSL from Cloudflare in Nginx is a simple process that can be done by obtaining the necessary keys from Cloudflare, configuring Nginx to use them, and testing the configuration. This will provide an additional layer of security for your website and ensure that sensitive information is protected.
Note*: You will need to have Nginx installed on your server, and this is just a basic example, You should also consider configuring additional security features like HSTS (HTTP Strict Transport Security) and OCSP stapling (Online Certificate Status Protocol) to further secure your website.*